The Best M&M Cookies: Soft, Chewy, and Nostalgic Perfection
There’s something undeniably magical about a fresh-baked cookie. But when that cookie is studded with vibrant, candy-coated M&M’s, it transcends mere dessert status to become a vessel of pure joy and sweet nostalgia. The quest for the *best M&M cookies* often ends here: with a recipe that promises and delivers a perfect balance of soft centers, delightfully chewy edges, and an explosion of chocolatey color. These aren't just any *mm cookies*; these are the ones that take you back to childhood, make new memories, and become an instant family favorite.
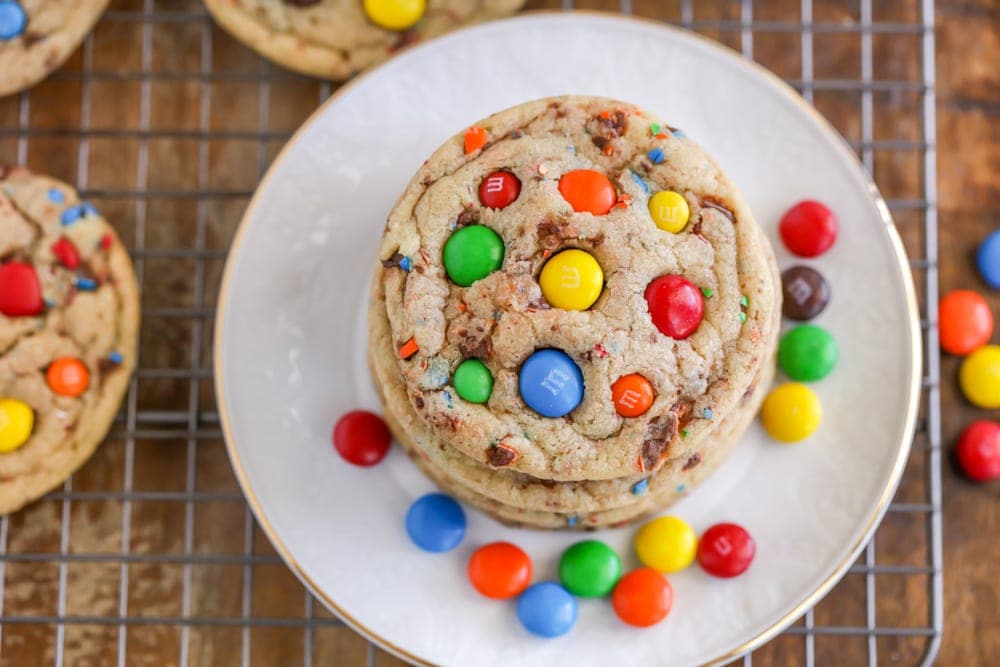
Imagine biting into a warm, gooey cookie, the buttery sweetness mingling with rich chocolate, all enhanced by the satisfying crunch of an M&M shell. This classic treat, a vibrant twist on the beloved chocolate chip cookie, is guaranteed to put a smile on anyone's face, regardless of age. Whether you're baking for a special occasion, a school event, or simply to fill your home with the comforting aroma of freshly baked goods, our comprehensive guide will help you master the art of making truly exceptional *mm cookies*.
The Anatomy of a Perfect M&M Cookie: What Makes Them Irresistible?
What elevates a good cookie to a truly great one? For *M&M cookies*, it's a harmonious blend of textures and flavors. The secret lies in emulating the best characteristics of a classic chocolate chip cookie while introducing the distinctive charm of M&M candies. The chocolate-filled M&M's, with their signature crisp candy coating, don't just add a burst of color; they contribute a unique texture and an extra layer of chocolatey goodness that sets these cookies apart.
These cookies aren't just *kid-approved*; they’re *feel-like-a-kid-again-approved*. They tap into a universal longing for simple, comforting treats. The vibrant hues of the candies add an element of playful fun, making them visually appealing long before the first bite. Beyond the traditional rainbow, the versatility of M&M's means you can easily adapt this recipe for any theme or holiday. Swap in red and green M&M's for Christmas, pastels for Easter, or even black and orange for Halloween. And don't forget the *mini M&M's* – many bakers swear by them, arguing their smaller size creates an even more delightful distribution of candy in every bite. Whether you opt for regular or mini, these colorful morsels are undeniably the star of the show.
Unlocking the Secrets to Soft & Chewy M&M Cookies: Key Ingredients Explained
Creating the ultimate *soft and chewy M&M cookies* begins with understanding the role each ingredient plays. It’s a delicate dance of fats, sugars, and leavening agents, all contributing to that coveted texture and flavor.
- Butter: The Foundation of Flavor and Texture
Start with softened, unsalted butter. Taking it out of the fridge about 30 minutes before you begin allows it to reach room temperature. This is crucial for proper creaming. Unsalted butter gives you control over the overall salt content, allowing you to perfectly balance the sweetness. When butter is soft, it creams more easily with sugar, incorporating tiny air pockets that contribute to the cookie's light texture.
- Sugars: The Sweet Symphony for Chewiness and Spread
Just like classic chocolate chip cookies, our *mm cookies recipe* relies on a blend of both brown sugar and granulated sugar. Brown sugar, with its molasses content, contributes moisture, chewiness, and a deeper, caramel-like flavor. Granulated sugar, on the other hand, aids in the cookie's spread and contributes to those slightly crispy edges that contrast beautifully with the soft interior. This combination is key for that perfectly balanced texture.
- Eggs: The Binding and Emulsifying Agents
Like butter, eggs should be at room temperature. This might seem like a small detail, but it makes a significant difference! Cold eggs can "seize" or curdle the softened butter, leading to a lumpy mixture that doesn't emulsify properly. Room temperature eggs, however, blend smoothly into the creamed butter and sugar, creating a cohesive dough that bakes evenly. They bind the ingredients and add richness and structure.
- Vanilla Extract: The Flavor Enhancer
A good quality vanilla extract is essential. Its delicate floral and sweet notes don't just add flavor; they tie all the other ingredients together, enhancing the overall profile and adding depth. Don't skimp on this one!
- All-Purpose Flour: The Structural Backbone
All-purpose flour is the go-to for most cookie recipes for a reason. It provides a stable, strong structure for the cookie while still allowing for a tender crumb. It's robust enough to hold up to the mix-ins but gentle enough to ensure the cookie isn't tough.
- Baking Soda: The Leavening Lift
A small amount of baking soda works as a leavening agent, helping the cookies rise slightly and encouraging them to spread gently during baking. It reacts with the acidic brown sugar to create that characteristic tender, slightly puffed texture.
- M&M's: The Quintessential Star
Of course, you can't have *mm cookies* without M&M's! Whether you prefer the satisfying chunk of regular M&M's or the delightful pop of minis, they are the undeniable heart of these cookies. For an extra touch of visual appeal, consider pressing a few extra candies onto the tops of the dough balls right before baking.
Crafting Your M&M Cookie Dough: A Step-by-Step Guide
The journey to perfect *mm cookies* continues with the precise mixing of your dough. Each step builds upon the last, ensuring a harmonious blend of ingredients.
- Step 1: The Creaming Foundation – Butter and Sugars
In a large mixing bowl, combine your softened butter with both brown and granulated sugars. Using a hand mixer or stand mixer, beat these ingredients together on high speed for at least five minutes. This lengthy creaming process is vital: you're aiming for a mixture that is light, fluffy, and visibly pale in color. This aeration is key to a tender cookie.
- Step 2: Wet Ingredients Integration – Eggs and Vanilla
Once your butter and sugars are perfectly creamed, beat in the room temperature eggs one at a time, followed by the vanilla extract. Make sure to scrape down the sides and bottom of the bowl thoroughly after each addition. This ensures all ingredients are fully incorporated and no pockets of unmixed butter or sugar remain.
- Step 3: Dry Ingredients Harmony – Flour, Baking Soda, and Salt
In a separate, smaller bowl, whisk together your all-purpose flour, baking soda, and a pinch of salt. The salt is crucial for balancing the sweetness and enhancing all the other flavors. Gradually add this dry mixture to your wet ingredients, beating on low speed until just combined. Be careful not to overmix; excessive mixing can develop the gluten in the flour, leading to tougher cookies.
- Step 4: Gentle M&M Incorporation – The Star of the Show
Finally, it's time for the M&M's! Switch from your mixer to a rubber spatula. Gently fold in the M&M’s. While a mixer can do the job, folding by hand prevents the candies from cracking or breaking too much, maintaining their vibrant integrity and ensuring a prettier final product.
The Art of Chilling and Baking for Ultimate MM Cookie Perfection
While the dough is now ready, the secret to truly superior *mm cookies* lies in one often-skipped step: chilling the dough. This patience is handsomely rewarded.
Dough Shaping and The Crucial Chill
Shape about 1/4 cup of cookie dough into balls. For even baking and a classic cookie shape, slightly flatten each ball to about a 3/4-inch thickness (approximately 2.5 inches in diameter), smoothing the edges. Place these flattened dough portions in an airtight container, separating layers with waxed or parchment paper.
Now for the magic: refrigerate the dough, covered, overnight. This isn't just a suggestion; it’s a game-changer. There's a fascinating science behind chilling cookie dough:
- Fats Resolidify: The butter in the dough firms up, which means the cookies spread more slowly in the oven, resulting in thicker, chewier cookies rather than thin, crispy ones.
- Flour Hydrates: Over time, the flour fully hydrates, absorbing moisture from the other ingredients. This process concentrates the flavors, leading to a richer, more complex taste.
- Flavor Development: The extended chill time allows the sugars and other ingredients to meld and mature, deepening the overall flavor profile of your cookies.
For more in-depth insights into why chilling dough makes all the difference, including customization tips for your *mm cookies*, explore our article on
Mastering M&M Cookies: Dough Chilling Secrets & Customization Tips.
Baking to Perfection
Preheat your oven to the recommended temperature (typically 350°F or 175°C). Place the chilled dough balls on a parchment-lined baking sheet, spaced a few inches apart. Bake for 10-12 minutes, or until the edges are lightly golden brown and set, but the centers still look slightly soft. Remember, cookies continue to cook for a few minutes after they're removed from the oven, so avoid overbaking.
Once baked, let the cookies cool on the baking sheet for 5-10 minutes before transferring them to a wire rack to cool completely. This crucial resting period allows them to firm up without becoming brittle.
These *best M&M cookies* are incredibly versatile. Beyond seasonal M&M variations, you can experiment with adding chocolate chips alongside the M&M's for an even richer chocolate experience, or even making mini-sized cookies for parties. For more exciting ideas and kid-approved twists on this classic, check out
Easy M&M Cookie Recipe: Family-Favorite & Kid-Approved Variations.
Conclusion
There you have it – the comprehensive guide to creating the *best M&M cookies* that are soft, chewy, and bursting with nostalgic appeal. By paying attention to the quality of your ingredients, understanding the science behind each step, and embracing the power of chilling your dough, you’ll consistently bake cookies that are truly perfection. These vibrant, chocolatey delights are more than just a treat; they're a celebration of simple joys, guaranteed to bring smiles and create lasting memories. So, gather your ingredients, follow these steps, and prepare to fill your home with the irresistible aroma and delightful taste of homemade *mm cookies*. Happy baking!